Concrete Patio Foundation Soil Prep: A Step-by-Step Guide for Salt Lake City, UT
A patio slab is only as good as what sits under it. In Salt Lake City, UT, the concrete patio foundation soil under your slab matters more than the finish on top, because clay-heavy ground and hard freeze-thaw winters will find every shortcut in the base work. This patio soil prep guide walks through soil prep and reinforcement step by step, written for property managers who need patios and shared walkways to hold up across multiple sites, not just look good on pour day.
If you manage rental properties or HOA common areas along the Wasatch Front, you have likely seen what bad base prep looks like: a patio that heaves at one corner, a slab that tilts toward the building, or cracks that show up before the second winter. Each of those traces back to the ground, not the concrete. Here is how a careful crew handles it.
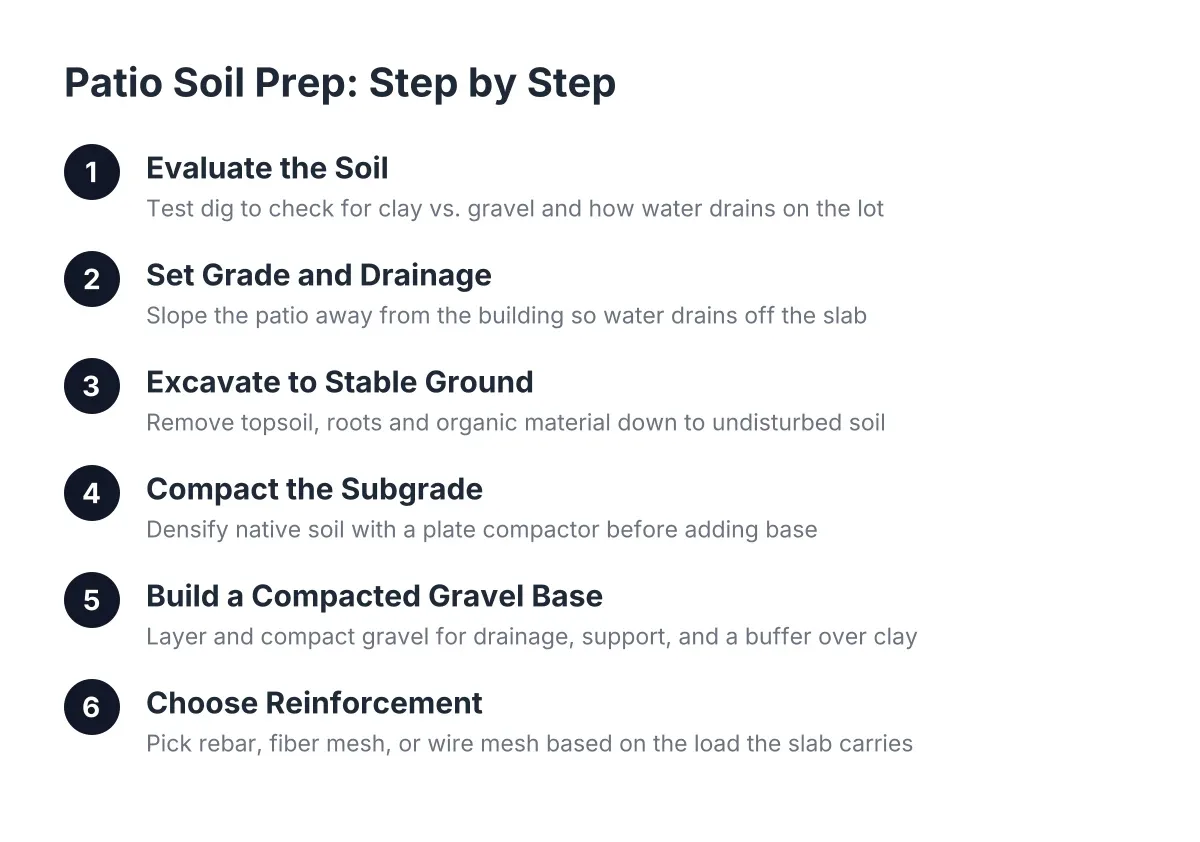
Step 1: Evaluate the Concrete Patio Foundation Soil Before Anything Else
Start by learning what kind of ground you are building on. The Salt Lake Valley has a mix of clay and gravel soils, and the two behave differently under a slab. Gravelly soil drains well and stays stable. Clay holds water, swells when wet, and shrinks when dry, which moves the slab above it.
A contractor evaluating a site will dig a few test spots to see what is under the topsoil. They will also look at how water behaves on the lot. Standing water after snowmelt, downspouts that dump next to the patio area, or a slope that drains toward the building all change the prep plan.
For a property manager, this step is where bids start to differ. If one bid includes soil evaluation and extra base depth for clay ground and another just says "pour 4-inch slab," you are not comparing the same job. Ask every bidder what they found in the soil and how it changed their plan.
Step 2: Setting Grade and Drainage for Your Patio Soil Prep
Before any digging, establish the finished height and slope of the patio. A patio that adjoins a house or building should slope away from the structure so water drains off the slab and away from the foundation. A common approach is a gentle fall across the width of the slab, enough to move water without being noticeable underfoot.
This matters twice as much on rental and HOA properties. A patio or walkway that drains toward the building sends snowmelt against the foundation every spring. That becomes a moisture problem in the unit, which becomes a tenant complaint, which becomes your problem. Set the grade right once and that chain never starts.
Step 3: Excavate to Stable Ground and Remove Organic Material
Next, dig out the area to the planned depth: slab thickness plus the gravel base, plus any extra depth the soil evaluation called for. All topsoil, roots, sod, and organic material come out. Organic matter decomposes and settles, and anything that settles under a slab leaves a void that the concrete will eventually crack into.
The goal is to reach undisturbed native soil. Fill dirt that was dumped and never compacted is a common trap on older Salt Lake City lots and on properties where previous work left loose backfill behind. If the excavation hits soft or disturbed ground, the fix is to dig deeper and build the base back up in compacted layers, not to pour over it and hope.
Step 4: Compact the Subgrade
Once the excavation reaches stable soil, rake the subgrade smooth and compact it. A plate compactor or tamper densifies the soil so it will not settle later under the weight of the base and slab. Skipping subgrade compaction is one of the most common causes of patio settlement, and it is invisible once the concrete goes down.
Clay soil needs attention here. If the clay is saturated, compacting it does little good; wet clay just squeezes around rather than densifying. A crew working after heavy snowmelt or spring rain may need to let the ground dry, or remove the worst material and replace it with gravel that compacts reliably in any season.
Step 5: Build a Compacted Gravel Base
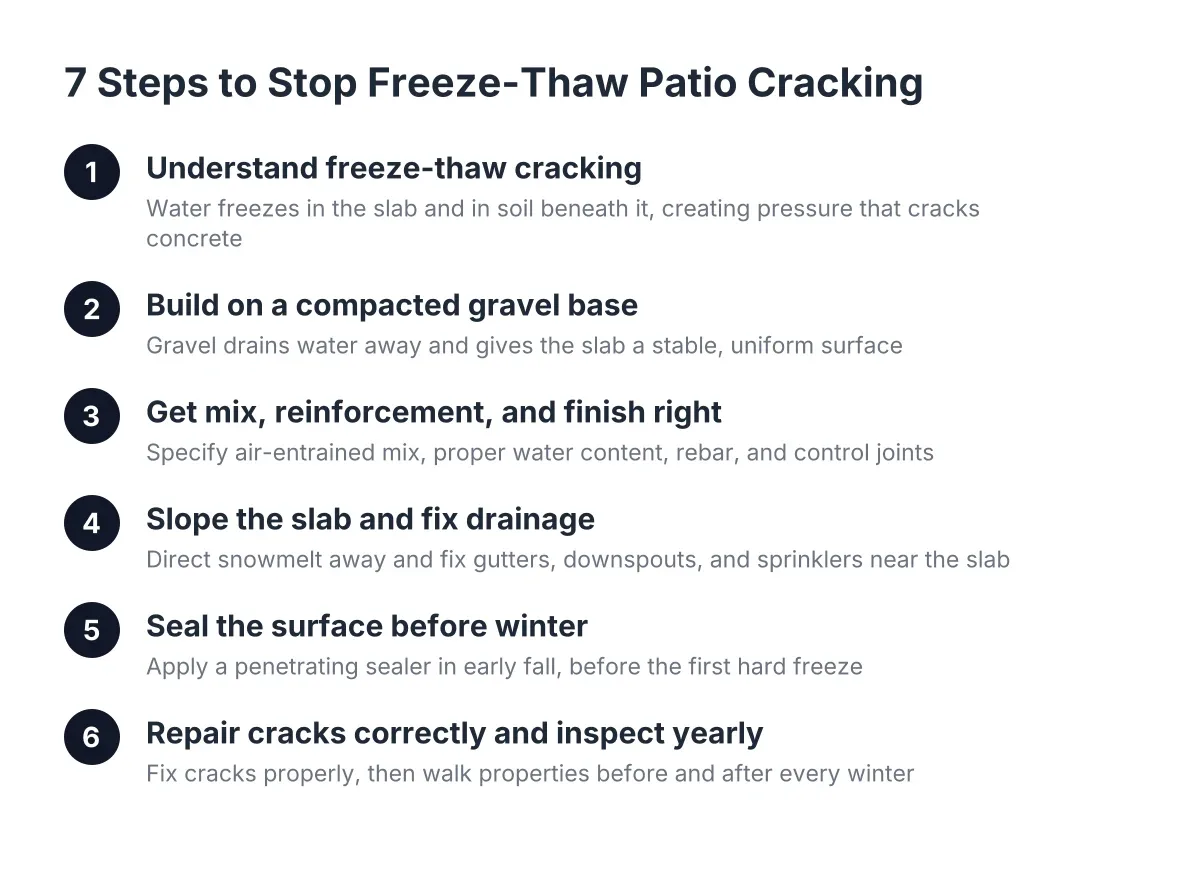
Now place the gravel base. In a freeze-thaw climate like the Wasatch Front, a compacted gravel base under the slab is not optional. It does three jobs:
- Drainage. Gravel lets water move through and away instead of pooling under the slab, where it would freeze and push the concrete upward.
- Uniform support. A compacted gravel layer spreads loads evenly, so the slab is not resting on soft spots and hard spots.
- A buffer over clay. Gravel separates the slab from expansive clay below, reducing how much seasonal soil movement reaches the concrete.
Place the gravel in layers and compact each layer rather than dumping the full depth and compacting once. Thicker base sections make sense over clay ground or where the patio will carry heavy use, such as a shared courtyard at a multi-unit property.
This is also where the connection between concrete patio foundation soil and base depth gets practical. Sandy or gravelly native ground may need less imported base. Heavy clay needs more. A contractor who quotes one base depth for every property, without looking at the ground, is guessing.
Step 6: Choose Reinforcement for the Load the Slab Will Carry
With the base in place, decide how to reinforce the slab. Concrete is strong in compression and weak in tension, and reinforcement handles the tension side. Common options for patios:
- Rebar, laid in a grid, adds tensile strength and holds cracked sections together if a crack ever forms. It matters most on slabs that carry real weight or span questionable soil.
- Fiber mesh, mixed into the concrete itself, is an inexpensive addition that helps control small shrinkage cracks. Many patios get both fiber and rebar, since the fiber adds little cost.
- Wire mesh is an older option that works when properly positioned in the slab, though rebar is easier to keep at the correct height during the pour.
For a small residential patio that only holds furniture, rebar is not always strictly necessary. For common-area flatwork at an HOA, a walkway that sees snow equipment, or a patio over clay-heavy ground, reinforcement is cheap insurance against a tear-out and repour later.
Step 7: Pour With a Workable Mix, Not a Wet One
The pour itself rewards restraint. A good patio mix keeps the paste and aggregate blended without separating, and it stays workable without extra water. Adding water makes concrete easier to push around and weaker once it cures, which is exactly the wrong trade on a slab facing Salt Lake City winters. Smaller aggregate like pea gravel helps the mix consolidate and finish cleanly.
On replacement projects, sequencing matters too. Suppose a property manager is replacing both a parking-area apron and a rear patio at a fourplex. A typical crew finishes the excavation and base work first, then removes the apron last, timed right before the pour, so tenants keep access to the lot through most of the job. That kind of scheduling is worth asking about before you sign, not after tenants start calling.
What Soil Prep Means for Your Budget in 2026
Good base work costs money up front and saves it over the life of the slab. For context, Lawn Love reports a professionally installed concrete patio averages $2,925 nationwide, and Concrete Network puts a typical 288-square-foot patio around $3,200, about $11 per square foot. Treat those as national reference points, not Salt Lake City quotes; local pricing depends on slab size, excavation depth, base material, reinforcement, finish type, and site access.
Here is the decision-stage math for a property manager. Say an illustrative HOA has a cracked common-area patio flagged in its reserve study. One bid skips base replacement and undercuts the others. If the original slab failed because of poor foundation soil prep, pouring new concrete on the same bad base buys the same failure again, and the board pays twice. The lower bid is only cheaper if the ground under it was never the problem.
The same logic applies to concrete patios across a portfolio. If you manage several properties, having one contractor evaluate the soil the same way at each site gives you consistent bids, consistent documentation for ownership reporting, and fewer surprises when winter tests the work.
Questions to Ask Any Bidder About Foundation Soil and Base Prep
Use these to compare bids on equal footing:
- What did you find when you checked the soil, and how did it change your base plan?
- How deep is the gravel base, and will it be compacted in layers?
- How will the slab be sloped, and where does the water go?
- What reinforcement is included: rebar, fiber, or both, and why?
- How will you sequence demolition and pouring to keep tenant access open?
When to Bring In More Than a Concrete Contractor
Most patio sites in the Salt Lake Valley can be handled with careful excavation, a compacted gravel base, and the right reinforcement. However, some ground is beyond standard prep. If the excavation reveals deep fill of unknown origin, persistent groundwater, or soil so soft it will not compact, a geotechnical engineer should look at it before any concrete goes down. That is a small cost next to a failed slab on a commercial property.
The pattern to remember is simple. Concrete problems in Salt Lake City are usually ground problems first. Get the foundation soil evaluated, drained, compacted, and covered with a proper base, and the slab on top will do its job through winters that destroy shortcuts.
If you need concrete patios, Salt Lake Valley Concrete can help.
Prefer to talk it through? Call (385) 433-4634 — a quick call is usually the fastest way to get a straight answer for your situation.